
Introduction
To any photographer hungry for improvement, post-processing software is part and parcel of the image creation process. I can list a laundry list of reasons, but the three main reasons are consistency, enhancement and restoration and optimization for specific outputs, especially in creative expression.
Impact-Site-Verification: 67806f6c-93a5-4c0a-8feb-1bc9dee76c98
Skylum has kindly provided a 10% discount code “KEITHWEE” for all subscriptions. Link here.
Given the advancements in adapting artificial intelligence into software, I have become curious after seeing photographers adding new options, such as Skylum’s Luminar Neo to their repertoire beyond the traditional processing software such as Adobe’s offerings. Thus, when Skylum, the company behind Luminar Neo reached out, I was super stoked to take the opportunity and, at the same time, share my 1st experience here.

To start on why Luminar Neo makes a real difference in my photography, the shot above is a previous throwaway shot from the Light Lens Lab Panchro lens review here. Luminar Neo allowed me to salvage it to a condition I am glad to share. More on the process and how the original shot looked like as we go ahead.
The 1st of many parts to come, today I will focus on the setup process and also, the 3 main key areas I see how Luminar Neo adding value to my exisiting workflow with real life samples.
tl:dr
As a long-time Adobe Lightroom user, I am impressed by what Luminar Neo can offer in terms of functionality and ease of use. Truthfully. I have only scratched the surface of the software’s potential here, and there are so many new AI-driven functions in the pipeline. With the never-ending presets available, there is hardly a good reason to not try this software.
I will be using Luminar Neo for a long time, especially for its helpful tool set. Plus, it can also work as an extension for Lightroom, which I will explore in time to come.
One key factor to me is a user-friendly experience. One should not have to attend a 20 hours course to learn how to work the software and Luminar Neo scores very highly in this aspect.
It took me around 15 mins to work my way through with Luminar Neo and from there it was testing all the different functionalities.
What is Luminar Neo (skip this section if you already know)
Luminar Neo by Skylum is a photo editing software that proudly echoes a user-friendly interface and powerful AI-driven features. It excels in quick and effective enhancements, offering AI Sky Replacement and AI Portrait tools. They focus on simplicity and provide easy-to-use tools for beginners and professionals to effortlessly elevate their photos with innovative editing capabilities.

Another key factor which Luminar Neo excels in is that enhancements to save otherwise ‘throwaway shots’ can be easily done with a few clicks.
An example will be that in the above shot done with a Nikon Zf and Z 40mm ƒ2.8, the immediate thing that hit me was how powerful the software was in differentiating the ‘sky’ part from the other elements in the shot. This was a one-click preset application, and I did not even use the more detailed AI-driven sky replacement methods available.
Setup process
The setup process on the Apple MacOS can be described with one word: Effortless.
Once you have downloaded the installer file and run it, you will be shown a QR code to download the companion app for iOS, which allows you to transfer files effortlessly between the computer and iOS devices. For first-time installations, one gets a 7-day free trial, and if you have paid for a subscription, you can simply activate Luminar Neo and hit the main workscreen.
Below is a slide show of the screens one will see during installation.


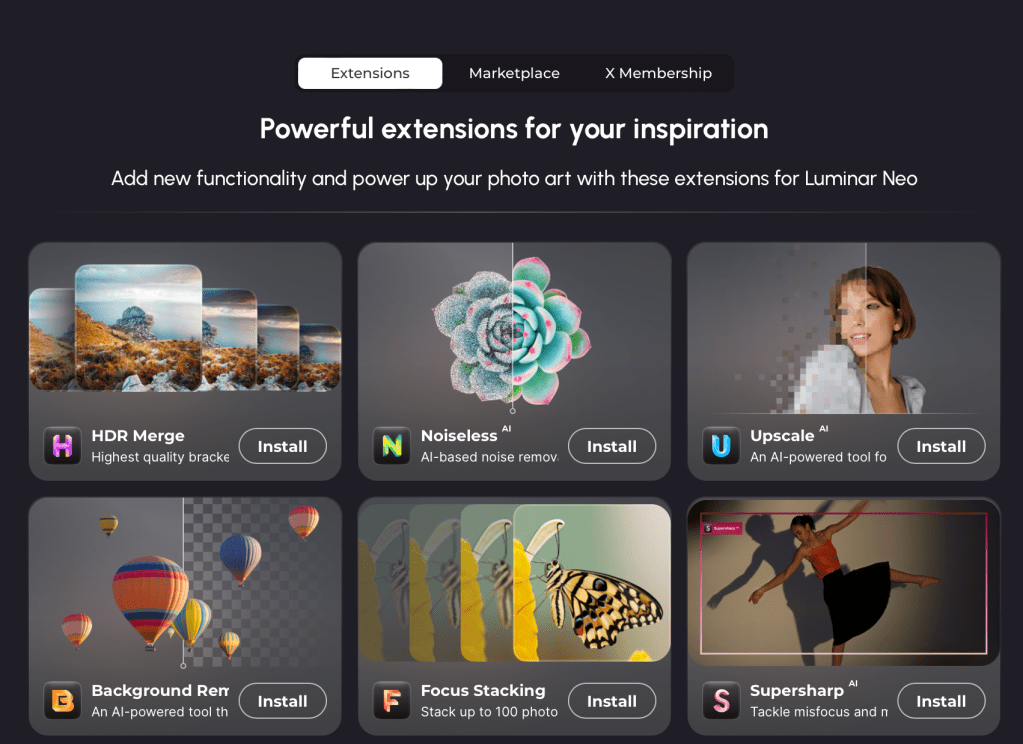
Another essential part of Luminar Neo is its extensions, which combine handy functions with artificial intelligence. I know I will use the HDR merge, Upscale, and Focus stacking in the future.
3 critical reasons for Luminar Neo I learned in my first 3 hours with it.
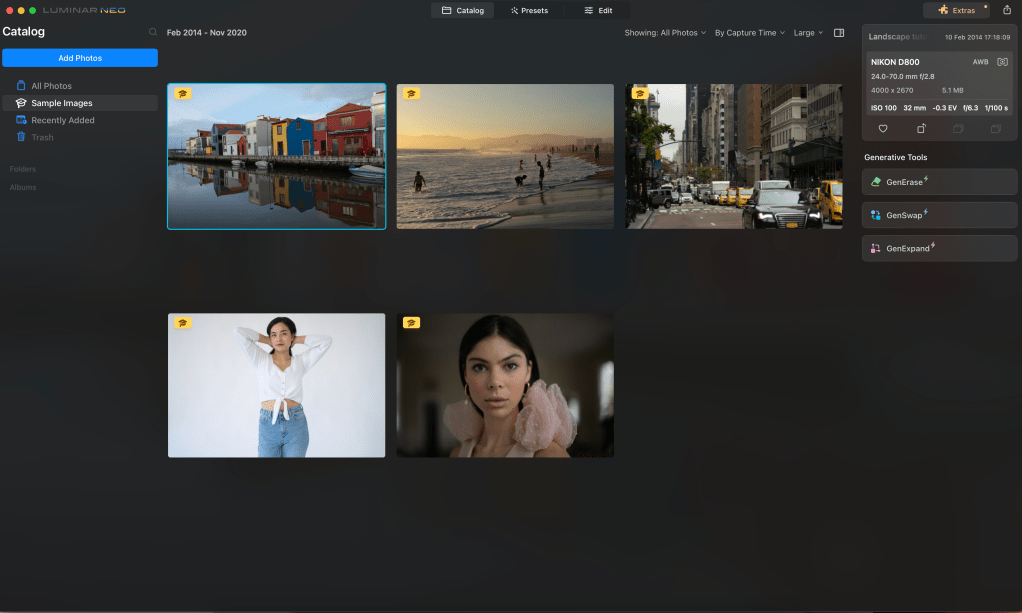
The main work screen is deliberately simplified and works as I want it to be, decluttered with a logical placement of functions. There are mainly 3 tabs, CATALOG, PRESETS, and EDIT, which simply refer to:
- Catalog: the area where all your files are.
- Presets: the tab where you can apply different ready-made Presets
- Edit: Similar to most post-processing software, one gains access to the full suite of image editing tools for all the parameters we are used to seeing, and more with access to a lot of AI-enabled tools categorized by main photography genres (such as Landscape, Portraits and on)

1. One-click Presets for almost every genre
Luminar Neo has a pretty extensive library of included presets; one can always purchase more to add to one’s versatility. One key area why this is important for me is that I realized that the presets work exceptionally well for landscape shots, especially in sky replacement. Look at the sample below.
The original image is shown below; it was a shot I liked quite a bit, especially in how yellow stands out; however, the day’s sky was simply, well, dull.

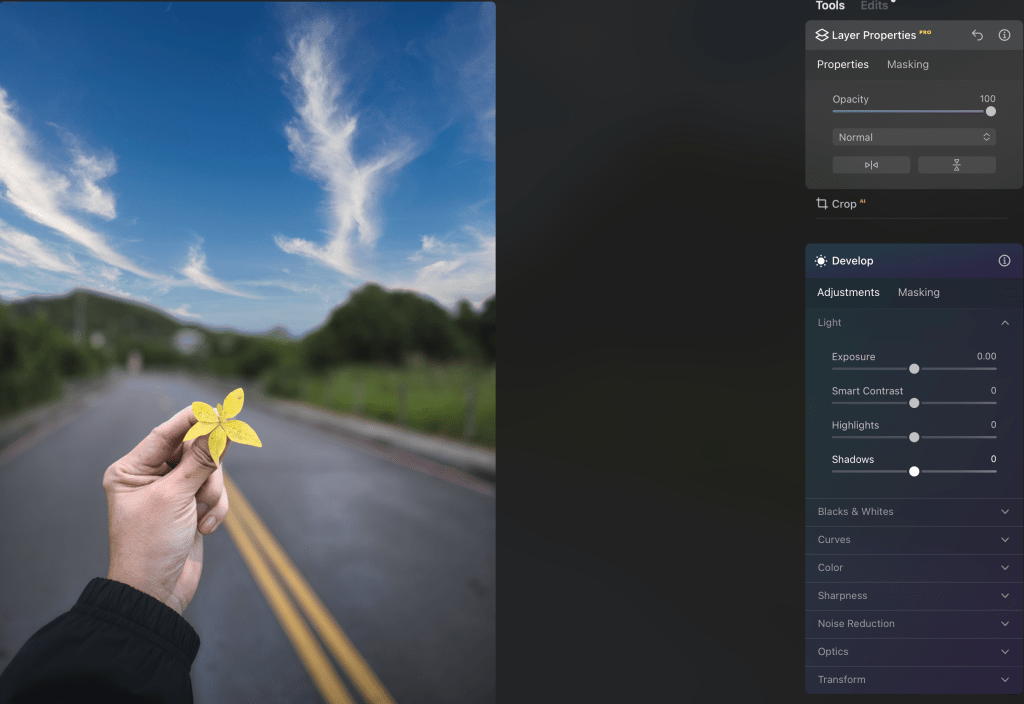
After double-clicking the file in Catalog to bring it up, I went to the EDIT tab, and from there, one is provided a list of possible enhancements.
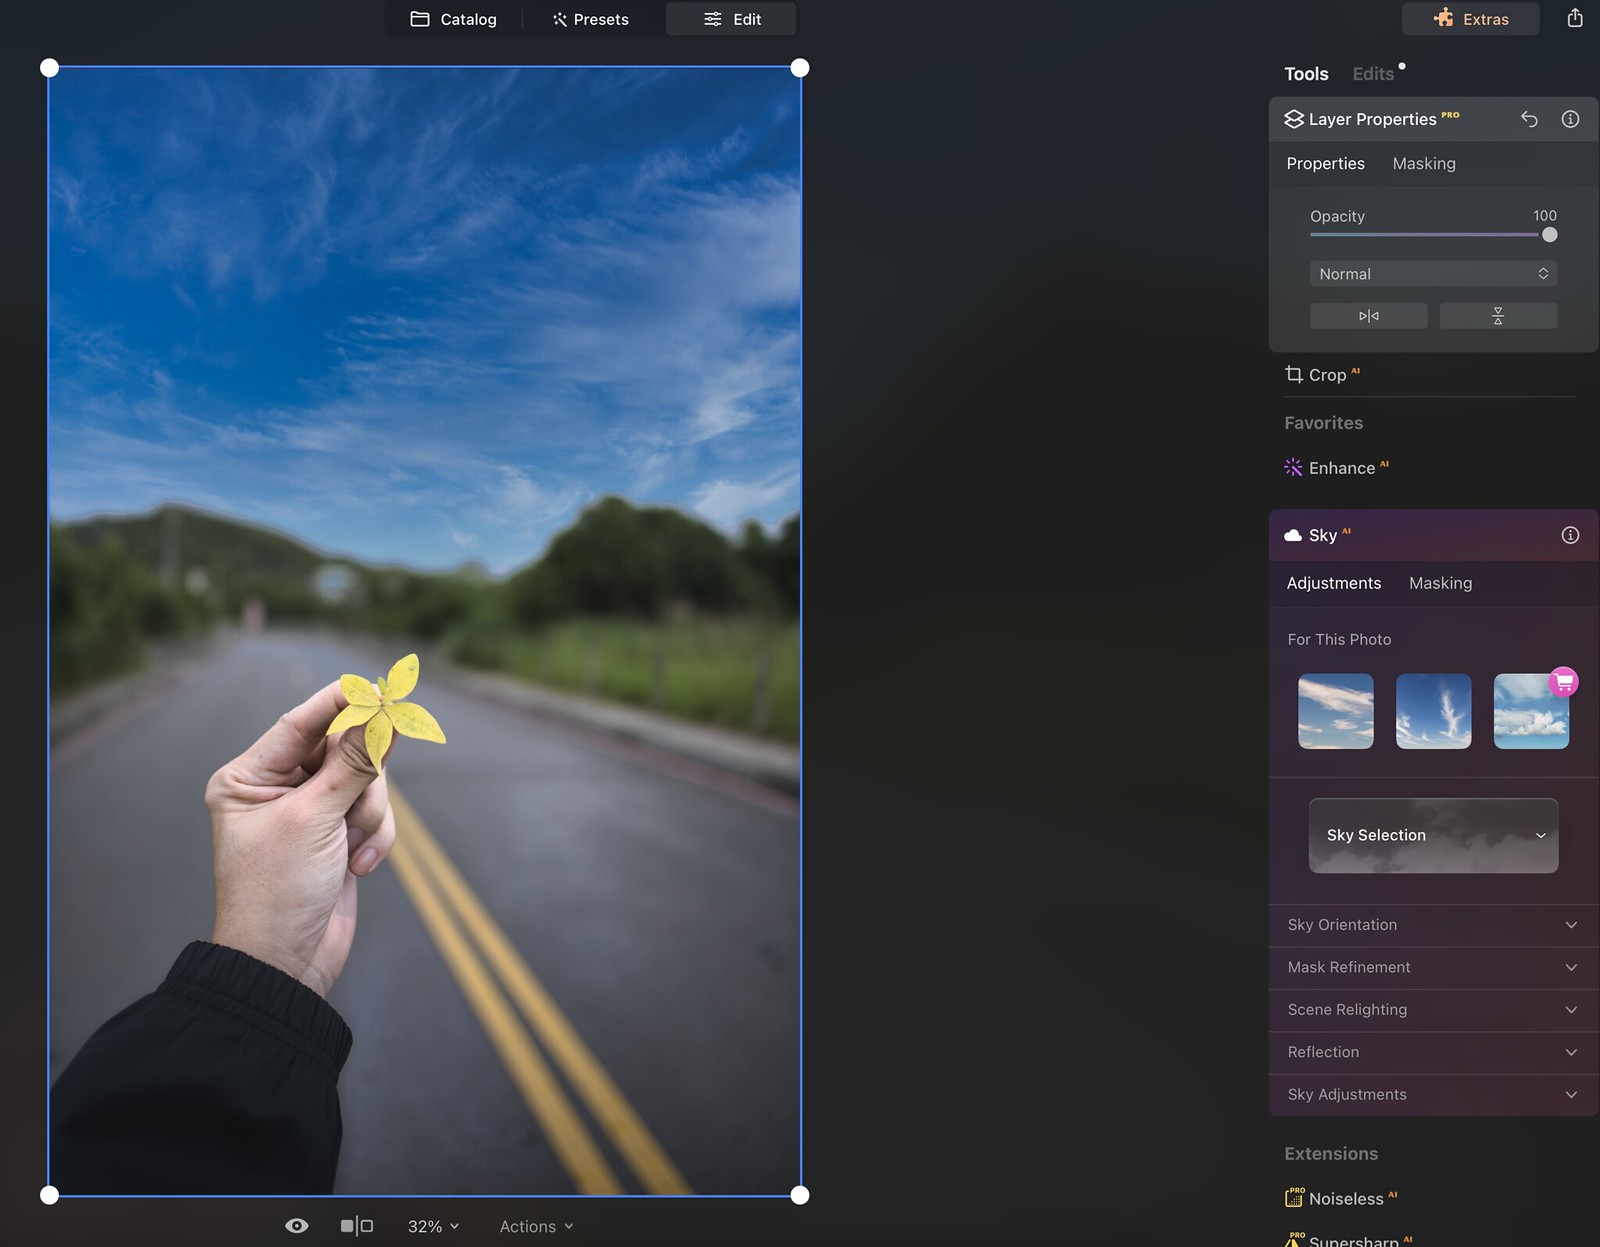
I simply selected SKY; next, Luminar Neo presented me with multiple options.
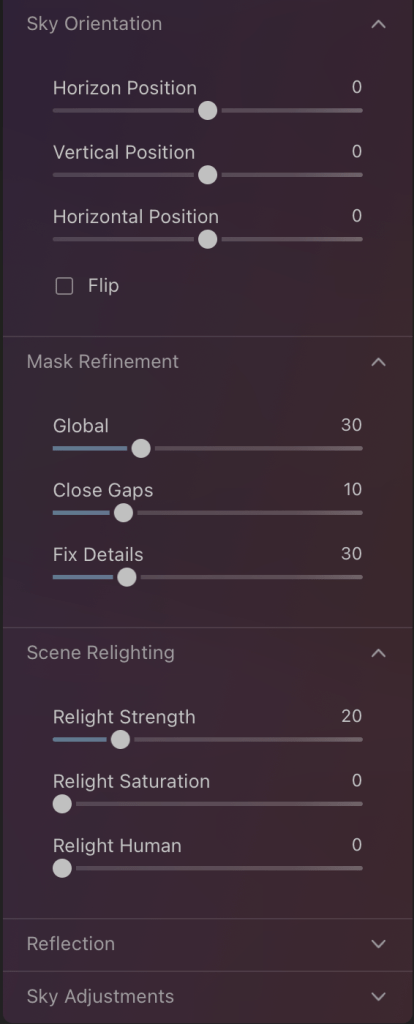
The more impressive part was that it was not just a direct copy-and-paste limited function; once the desired SKY was selected, one could delve into the minute details if one wished to, down to modifying the strength and direction of light on the subject. The user, of course, has access to the typical exposure options and even the choice of applying a cinematic tone to the whole image.
Amazingly, there was not even a need for me to add layers, do any loupe selection, etc, and basically, the software decided which area was the sky and did a replacement in one step.
Select the photo below to expand it.
The final result of an otherwise much duller shot.

2. Portraits enhancement
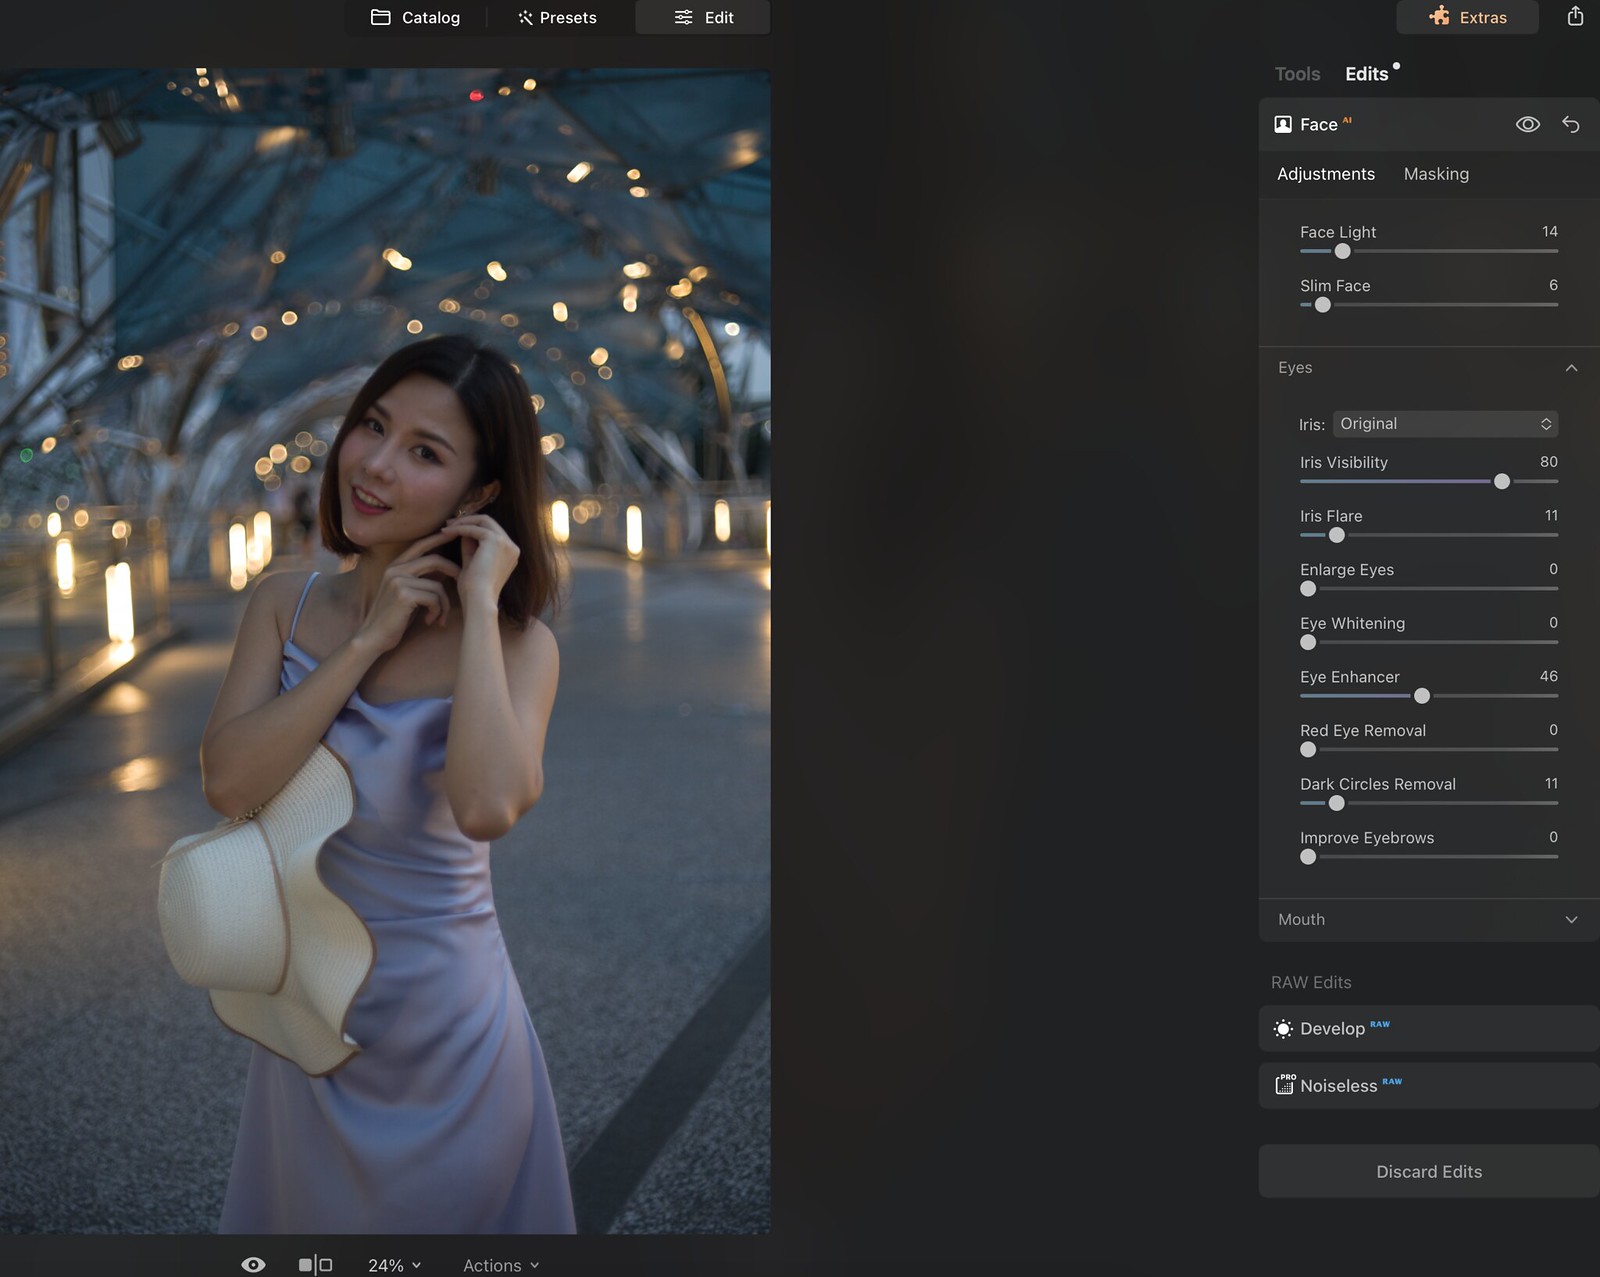
If you have followed what I do, you will know that my most often photographed genre is portraits, and in this genre, Luminar Neo seems to come fully prepared with options to enhance the shot in the most user-friendly way possible.
For this, I decided to test Luminar Neo with a shot below, which I did for the Light Lens Lab Panchro review but did not use.
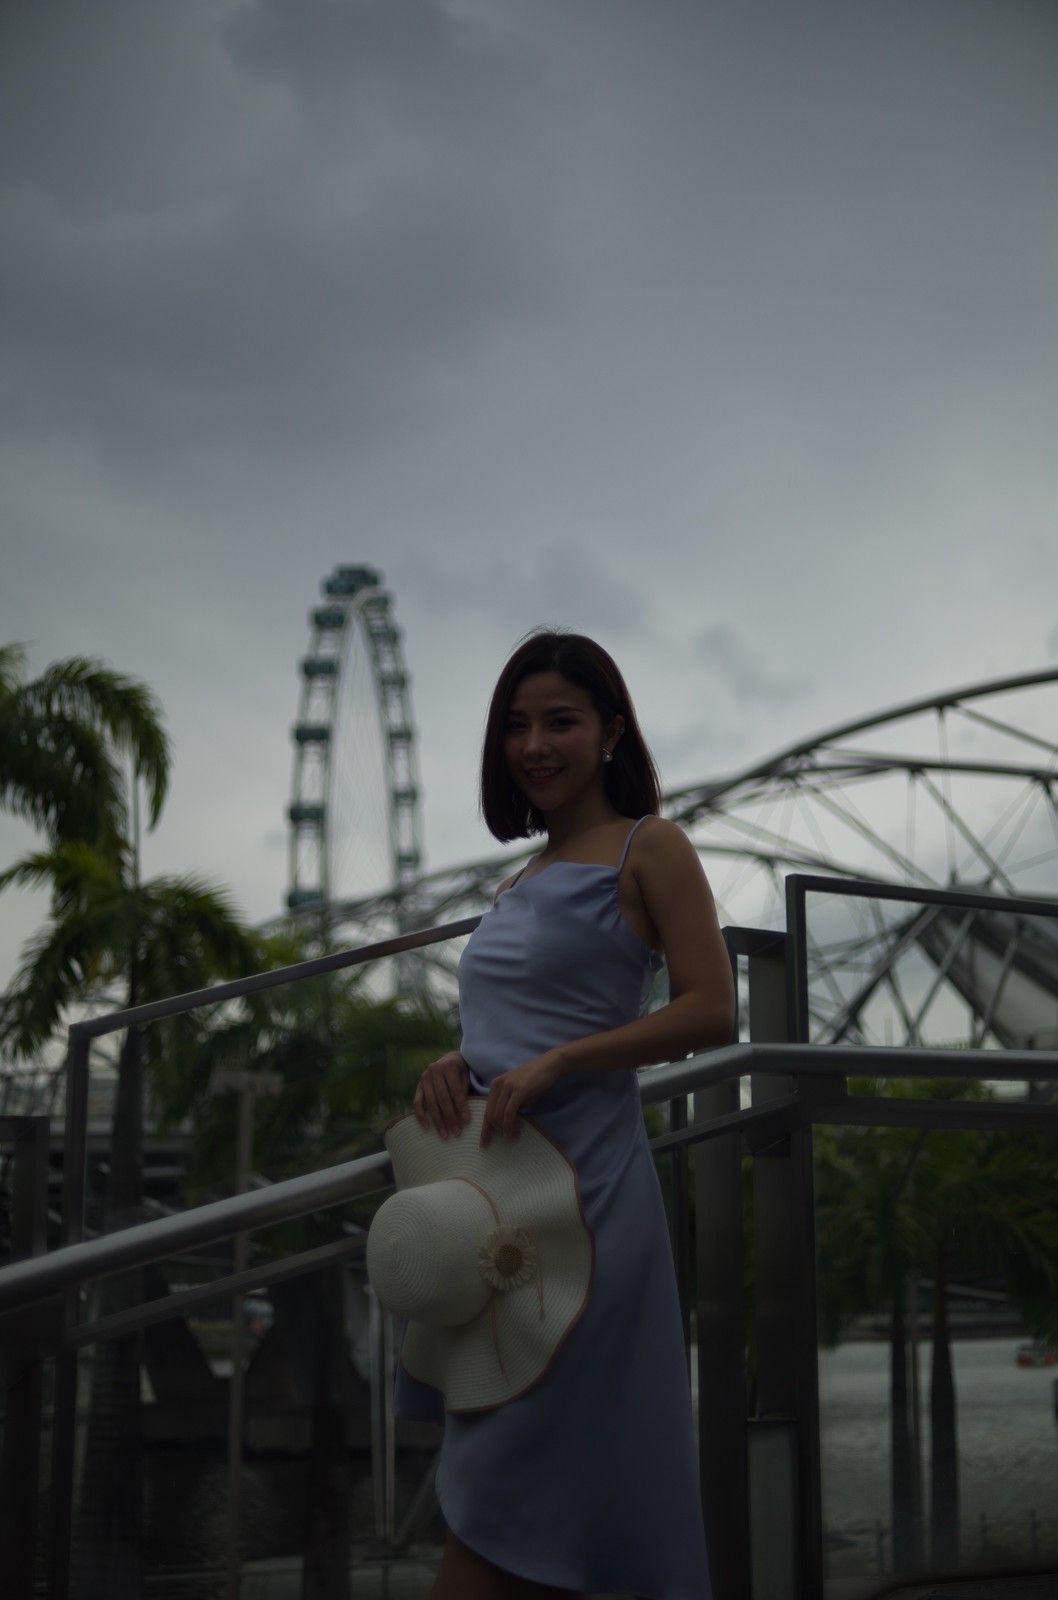
For this image, I went ahead with a list of enhancements, from replacing the dull sky with the same function shared above. I also went into the options for Face on the right sidebar, which gives a comprehensive list of options such as iris, eye enhancements, the shape of the face down, and how light falls on the model’s face.
Versus the software I am currently using, where touch-ups such as removal of eye-bags etc are a much more time-consuming process, Luminar Neo’s approach is much more concise, intelligently picking the area to work on and allowing detailed adjustments.

Locate, select and pull slider and that is it.
The final result is below, and in this case, a shot that was previously chucked aside can be used (though not for reviews, as I pride myself on showing samples straight out of the camera).
3. AI tools (Generative Erase, Generative Swap, Generative Expand, Accent, and Sky slider AI tools)
Recall the hype when Photoshop released an AI-enabled smart eraser to remove unwanted items in one’s image? It works to a certain extent, but the vital issue is always the ‘correct’ regeneration of the image’s blank spot; this is the part Luminar Neo impresses.
Here’s another image I liked, but my camera strap was captured on the left side, marring the image. Plus, I felt that the light in this image could have been better shaped.
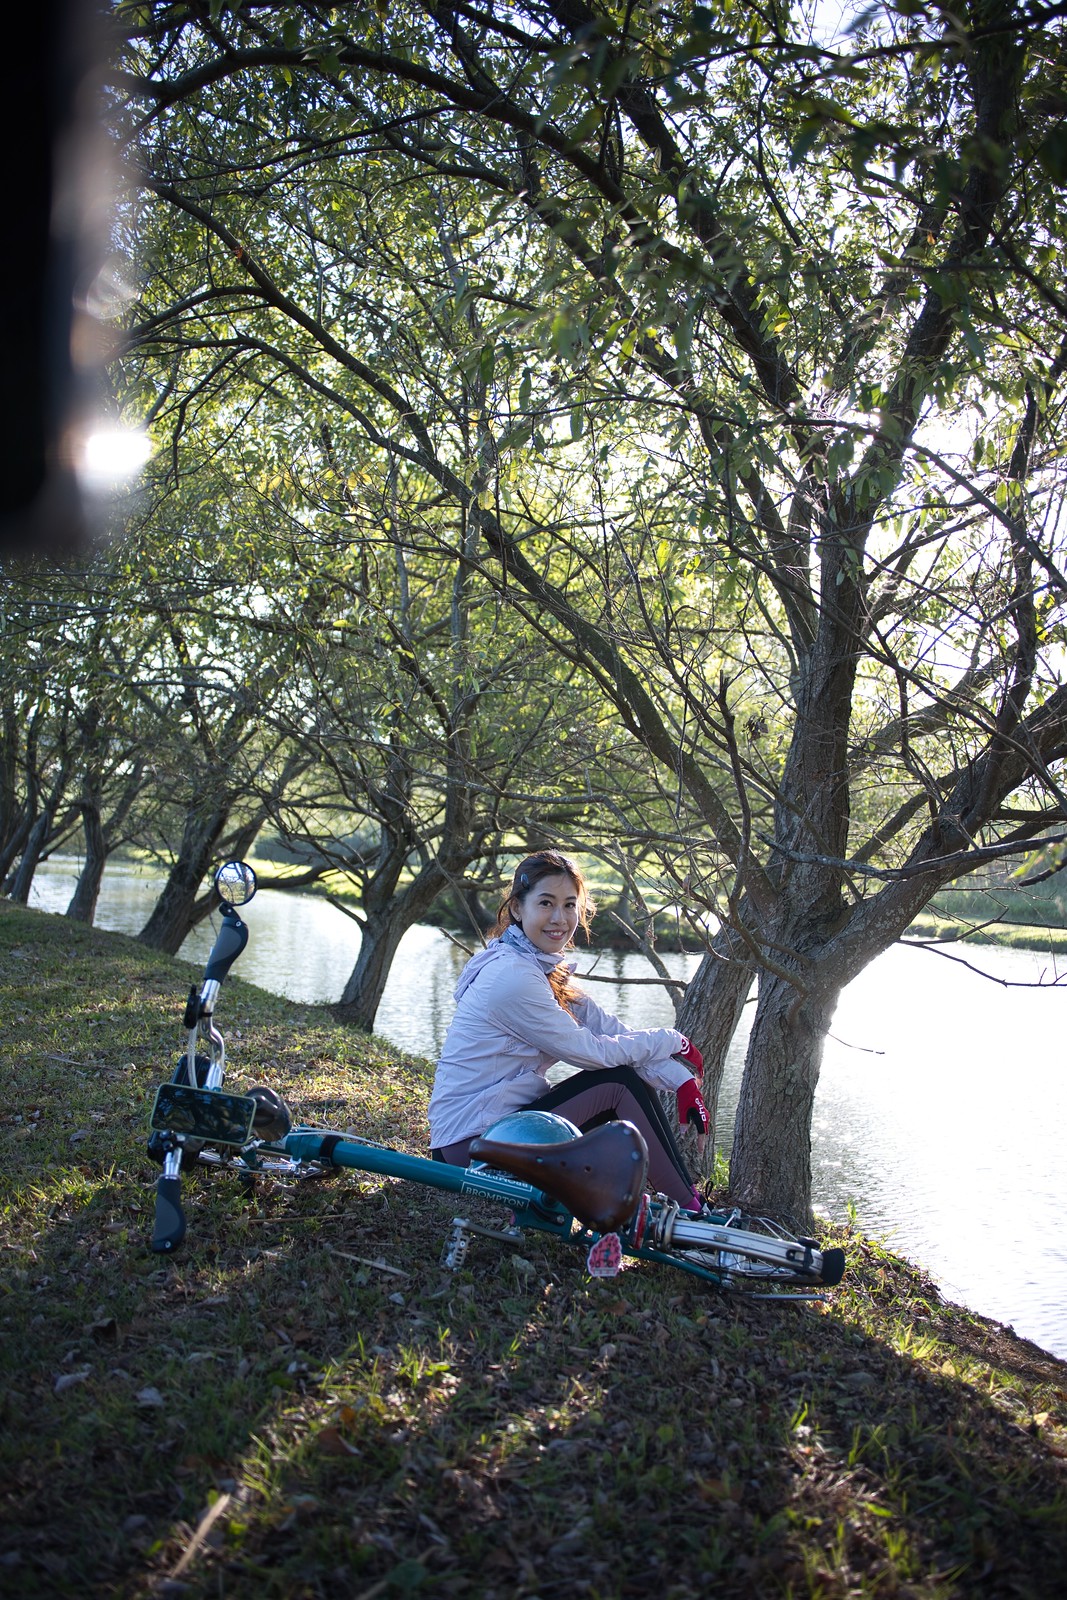
Putting the image through the Generative Erase tool was as simple as selecting the tool and ‘color’ the area to erase and rebuild, a step that my kids surely can do well, too. And yes, the impressive part was not removing the offending part, but how powerful the AI was in reconstructing the complicated branches and leaves to ‘cover’ the image area.


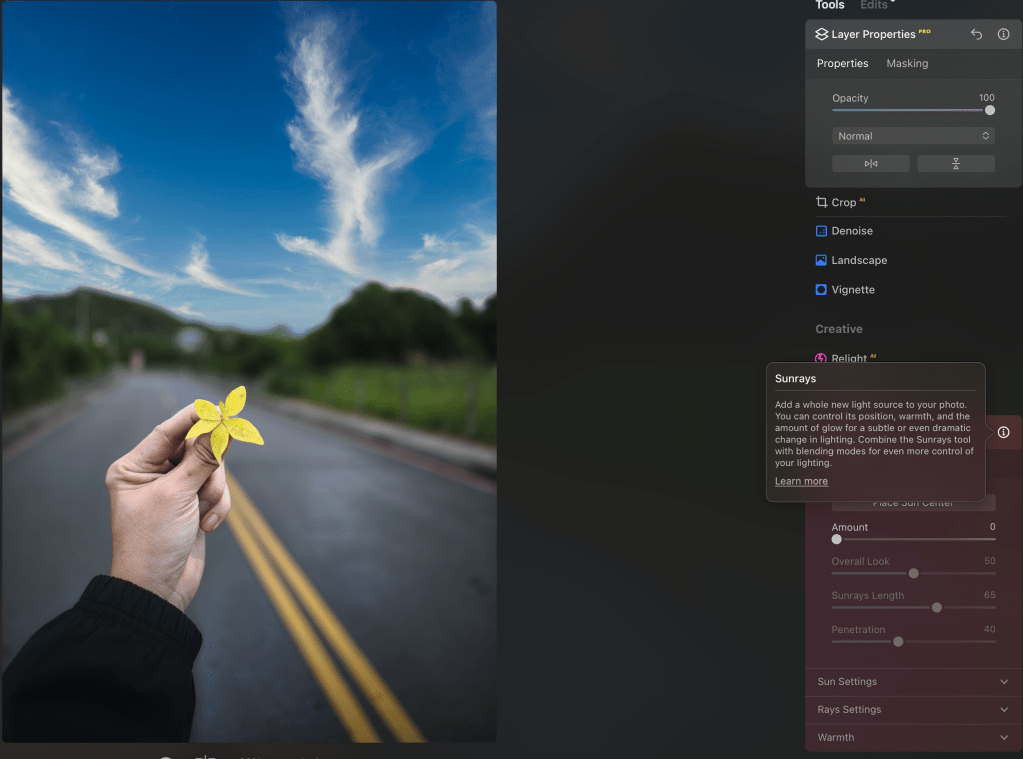
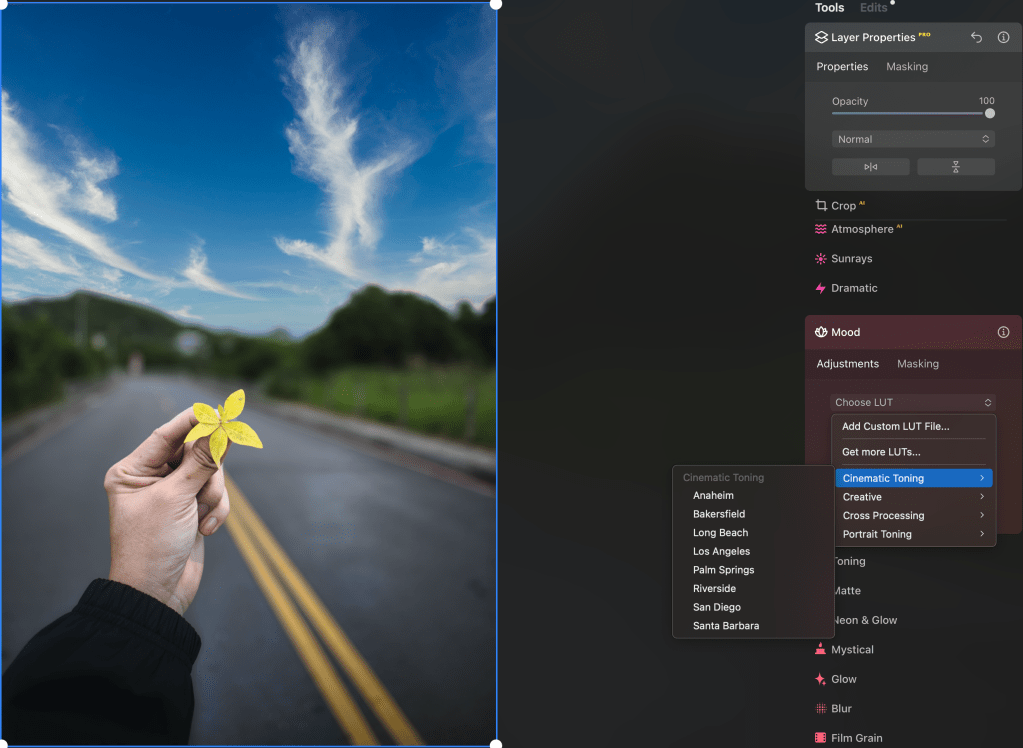
Not done yet. After I finished the basic exposure edits under the Essential section, as I felt that the play of light could be further worked on, I went to Moods under the Creative section, which provides many different LUTs to work with.

Here, I decided to add in more ‘sun’ to enhance the warmth of the image; found under the Creative section, one can choose where to place the ‘center of the sun’ and make detailed adjustments down to the length of the sun-rays or even the degree of penetration.
The final image.

And in a world where time is always scarce, the above edits were done by first-timer me in around 20 minutes, figuring out as I went along. I am confident a seasoned user will probably take 10 minutes to do.
Conclusions
Actually, I do have a confession to make at this point. I did not read a manual or watch an instructional video to prepare for using Luminar Neo to see how intuitive the processes were, and I left really impressed. I don’t know about you, but watching step-by-step videos for convoluted processes is kind of ‘slow’ in today’s world, even though I fully recognise the creators’ efforts.
Personally, I see myself as more of a traditionalist coming to post-processing, preferring minimal edits and choosing to go straight-out-of-camera for reviews where possible, but this takes nothing away from the potential of new generation photo-editing software like Luminar Neo, which not only provides the functionality but has been built ground up with a focus on logical user-friendliness in its processes.
I would purchase the software alone for its one-step Generative-erase/swap/expand functions, which simply work and aren’t a gimmick.
The fact that I could get everything working with the output I desired without reading the instructions within 30 minutes and ended up enhancing or repairing shots that I liked is way more valuable than the cost of this software, which I know will only further evolve and improve.
Embrace the progress. After all, more possibilities are never a bad thing.
Thank you for reading.
Read more about AI Photo editors with the 10 Best AI Photo Editors for Photographers in 2025.
Skylum has kindly provided a 10% discount code “KEITHWEE” for all subscriptions. Link here.
Disclaimers.
- The license of Luminar Pro was generously provided by Skylum. I have no idea how much it costs, to be honest, but I have asked them to kindly offer 10% discount codes for those who are keen.
- The images used in this sharing are all photographed and edited by me, and unlike other reviewers, I do not use any images not originating from me.
- I was not paid in any form for this sharing. Frankly, this opportunity nicely falls into my lap to learn at least 1 new thing or skill every year.
- 5. The best way to support me is to share the review, or you can always help support me by contributing to my WordPress fees for the domain using the PayPal button at the bottom of the page.

Very interesting to see what new software can achieve. Thank you for sharing this Keith.
LikeLike
Hi there, welcome 😀
LikeLike
Hi Keith, nice article and I am appreciative of the step by step screens. I never liked to watch YouTube videos and prefer to read at my pace and am very glad to find this.
LikeLike
Hi, thank you! Similar for me too, and I am glad to always know there is a group of users who prefer the good old read vs a video.
LikeLike
Hi, great review! I’ve been using Luminar Neo for a while now, and this is one of the most informative reviews I’ve come across. I’m definitely going to try some new tools for myself
LikeLike
Hi Anna, thank you for popping by 🙂 great to hear from you.
LikeLike
Thank you for this review. My photographer son recommended Luminar Neo. After reading your review, I am persuaded that Luminar Neo is the software for me!
LikeLike
Hi, thank you for popping by. Luminar Neo has since made more updates avail from the time I wrote about it and hope it works well for you too.
LikeLike