
No matter whether you are a hobbyist or a professional photographer, it is without a doubt that we all want to maximise the functionality of our cameras and of course, test out newly released functions to see what they can do for us whether it is in our work or passions.
And it seems that among all the interest and hype generated with Fujifilm updating the GFX50S, X-H1 and X-T2 with thefocus stacking function, there have been few places online detailing a process coming to the steps to do so and this is what I hope to do so today.
So let us start on: Focus Stacking in Fujifilm.
To start off, the equipment of my choice was the X-H1 and the XF90mm F2.
(If you are curious why not the GFX50S and the GF110mm, the frank reason is I do not have confidence my entry level iMac would be able to handle the processing of stacking GFX50S files and so yeap 😑)
Disclaimer:
This wasn’t a shoot for a client and more of me trying to document a visual process for everyone on the focus stacking process hence I agree there are many ways where the process can be improved: from using a stronger tripod, better backgrounds, better post processing, a more expensive watch, remembering to wipe off my fingerprint, shooting at ISO 200 etc but again, my concern here is to share the process so more of us will be acquainted and not find the focus stacking process daunting.
Setup.
Setup was simple with a Foldio 3 studio, a Manfrotto Pixi (I 100% suggest as strong a tripod you have and I was literally being lazy here)
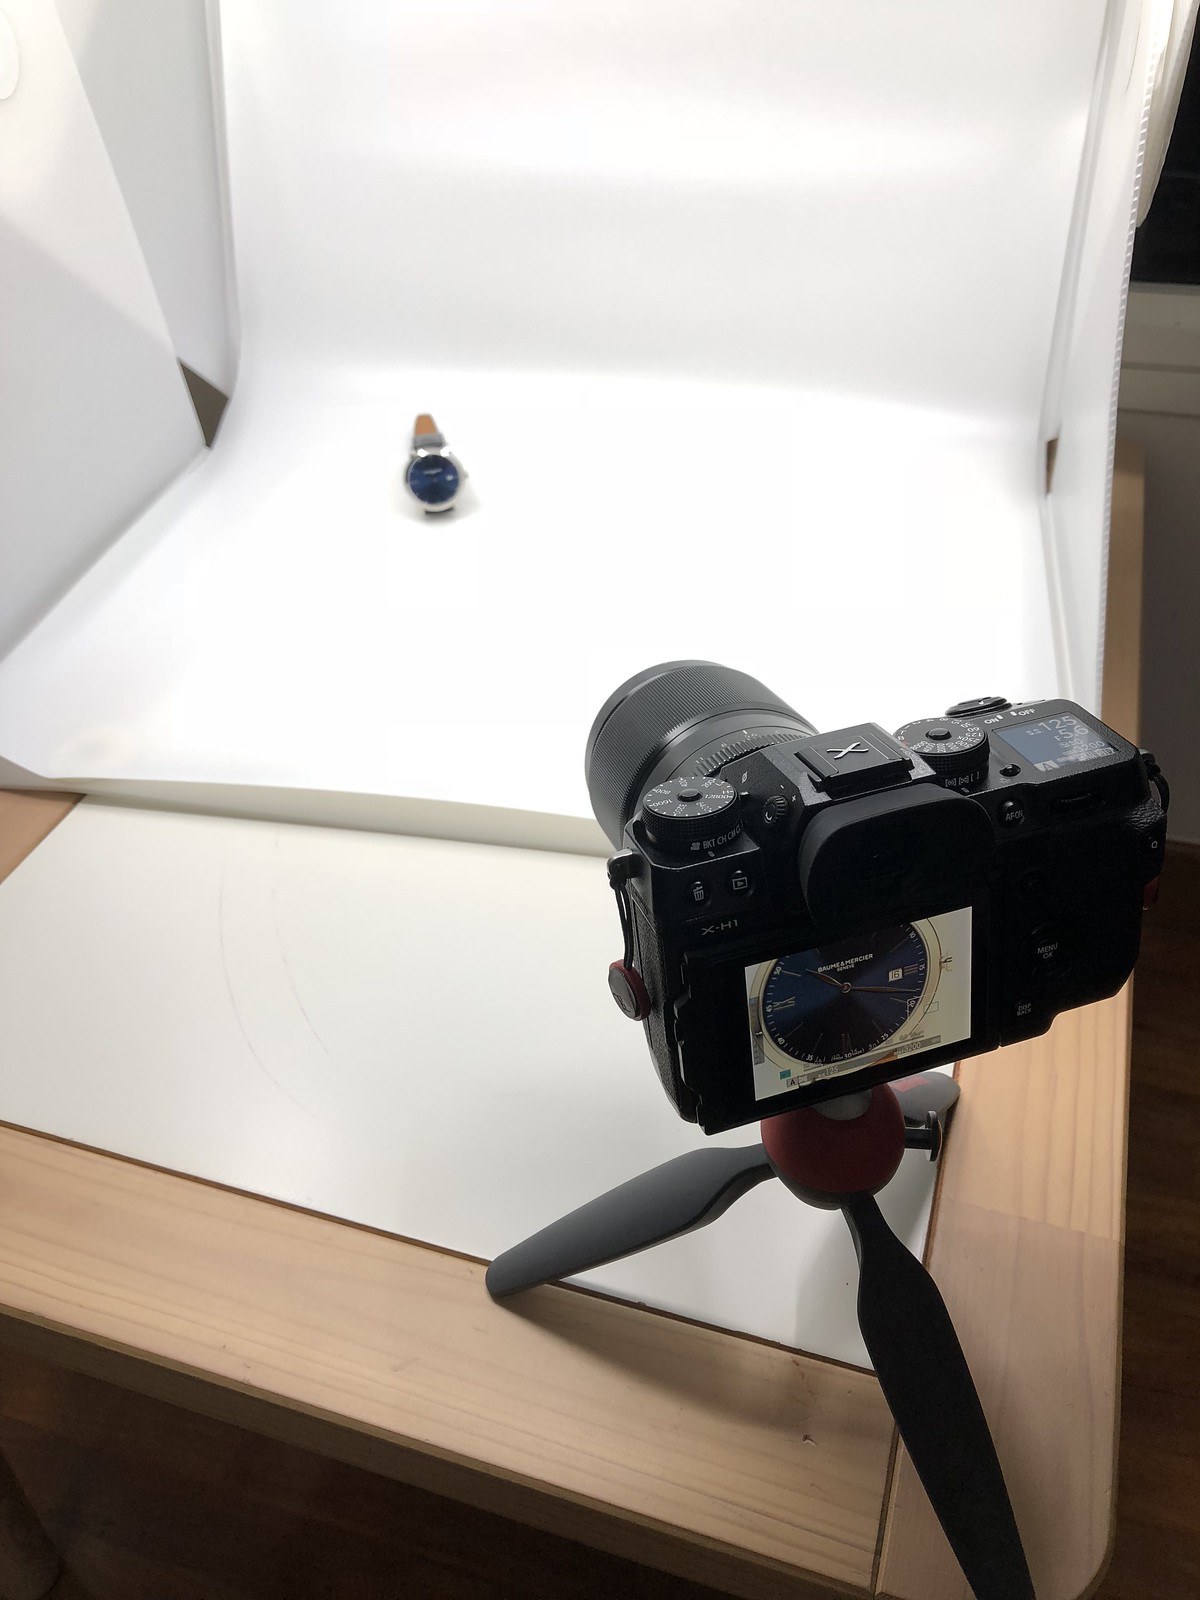
In camera, it was a quick jiffy accessing the Focus stacking options at:
Menu → Shooting Settings → Drive Settings → BKT Setting → Focus BKT.
The most often asked questions come next, which is what values does one set for Frames/Step/Interval.
My best answers are:
Frames: The number of frames you wish to take, note you can do up to maximum of 999 frames but the higher the number of frames will also mean more work later stacking the images in post processing.
Step: My understanding of this is it affects how much the sensor moves between shots. Min value is 1 to a Max of 10. Lower the number, the less the focus change will be.
Interval: The timing between shots in seconds, min value is 1 to a Max of 10. My gut feels are go for a 2~4 seconds so that the camera doesn’t have to rush through and you don’t feel yourself aging waiting.
For this round, my settings were: 40 frames, 3 steps and 2 seconds. My gut feeling was of if its a small item like a 40mm watch, its likely 40 frames will be sufficient for good depth of field across, 3 steps from gut feeling again and 2 seconds just so that the camera won’t take too long between shots. There maybe someone with a magical formula out there but for now, I haven’t seen any and I guess there’s a bit of experimentation involved as we prod along.
I also shot in Electronic Shutter mode to minimise vibrations and like all good photographers, I used manual focus here to ensure I don’t miss the (ahem) focus.
and so, once ready, depress the shutter and one is set to go.
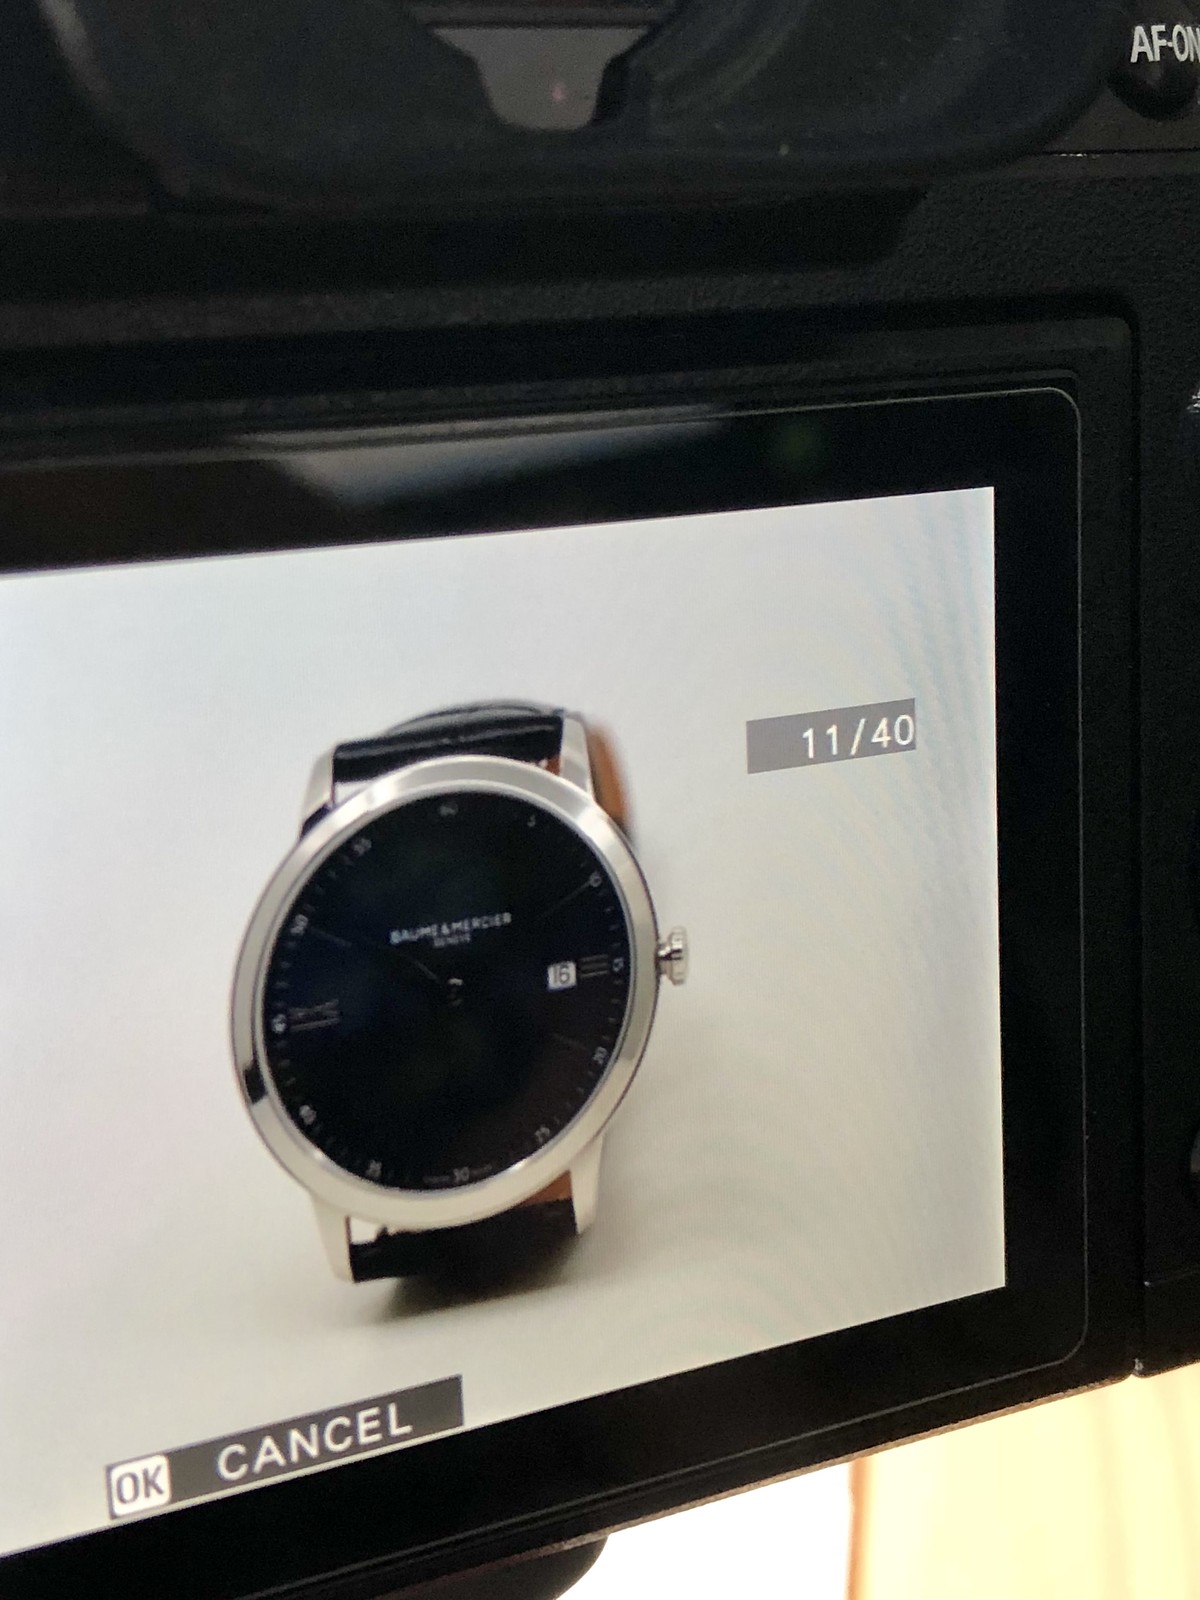
Shot 11 of 40, the camera will do its fair share of work now.
Once done, I downloaded the files and uploaded them into Adobe LR.
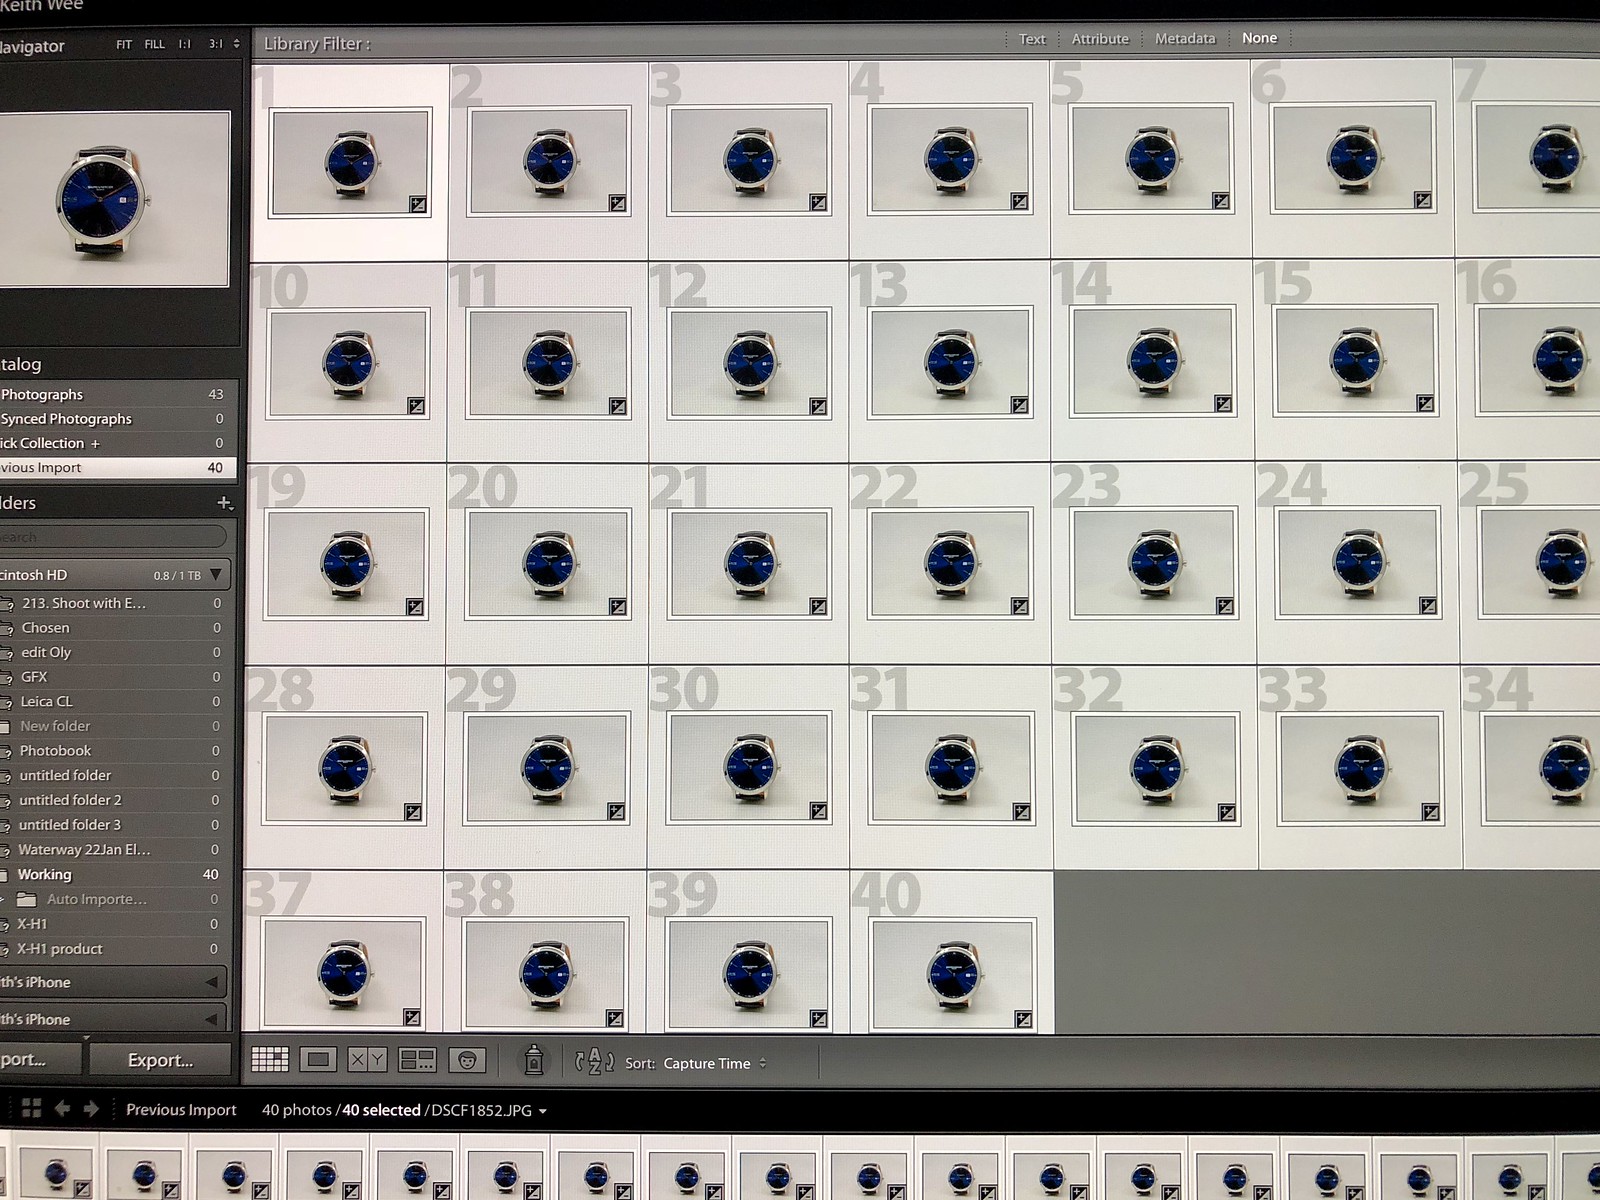
Yeap, 40 of them.
And to give a quick explanation why we need to do focus stacking is that when doing close up shots (of products especially) the depth of field is generally insufficient across the image and focus stacking allows a solution where we simply layer and stack images shot across different points of focus in the same image to form a single final image where it is focused all across.
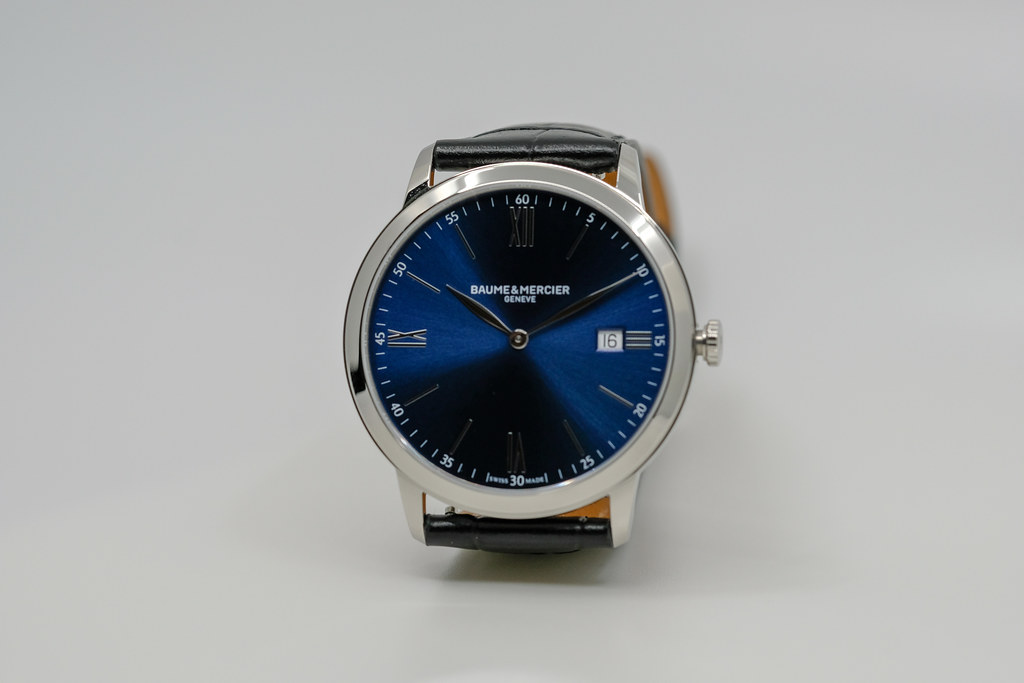
The following images below show some of the 40 shots done, and why depth of field was lacking across (aperture used was F5.6)
 (note straps, and the 15 min markings)
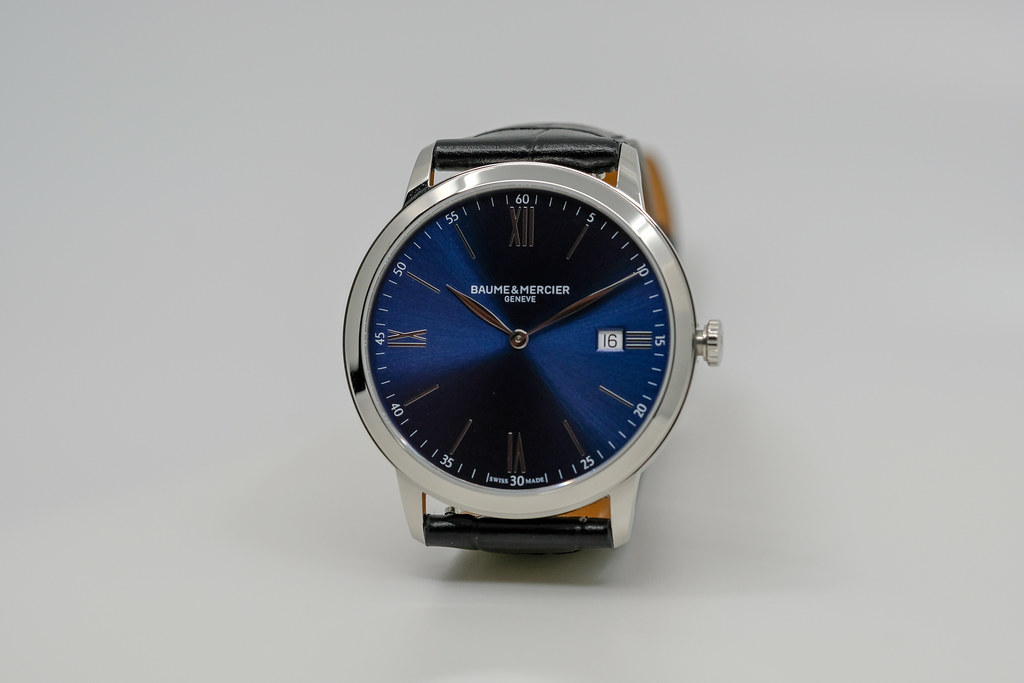
(note bottom , especially the 30min markings)
(note name of brand)
Within Lightroom, I adjusted the white balance and exposure and used the Sync function to ensure uniformity across the 40 images.
Once done, the next step is to export to Photoshop CC by going to the ‘Library’ module, selecting all the images and right-clicking to select the ‘Edit In’ and then ‘Open as Layers in Photoshop’ option.
Once this is done, we have to wait a while for Photoshop to load the layers. Waiting time is dependent on how fast the system can process the workload.
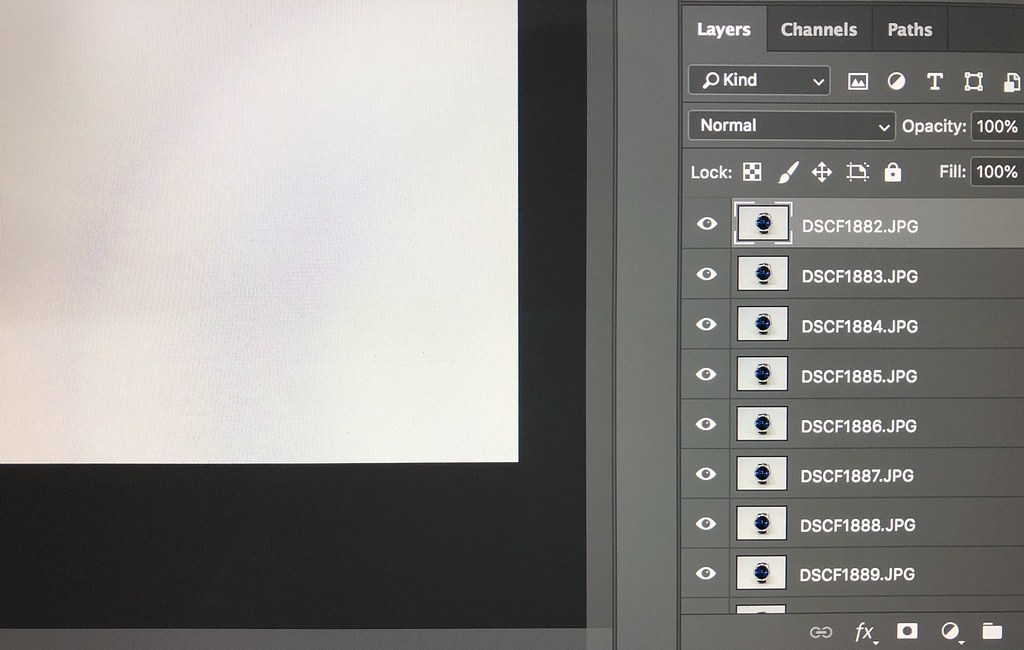
Under Layers, one can see all the images we are now going to use.
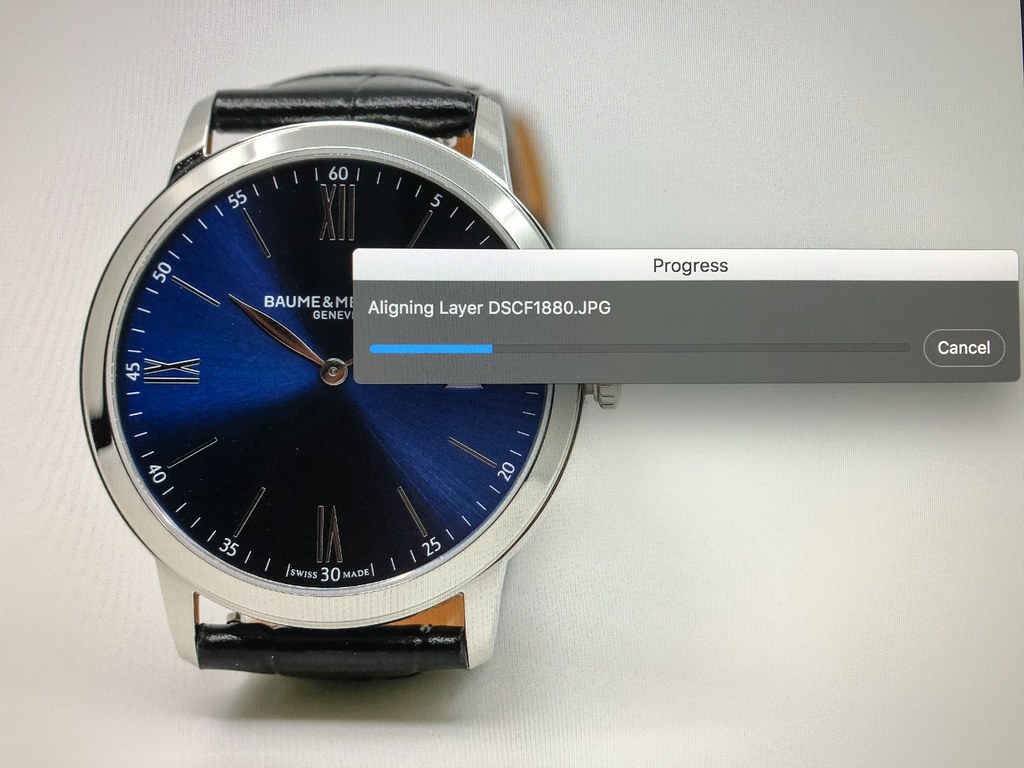
Once all the images have loaded in Photoshop, select all the layers (images) – go to Edit Menu and select ‘Auto-align Layers’. It is good to use the default settings and this can be quite a slow process.
Once this is done, we will go back to Edit Menu and now select ‘Auto-Blend Layers’ allow Photoshop to do a final round of clean-ups to the image.
As a comparison, it took around 20 mins for my system to get all this done. (iMac 2017 21 inch base model)
Once the whole process is done, we are almost there. Make any further adjustments one will need and once done, simply ‘close’ the project and choose to save the project and yeap, we are back to Lightroom with a merged file in ‘tif’ format for your final touches.
and finally, with all your needed adjustments done in Lightroom, export the image and you are done !
My final ‘tif’ file weighed in at close to 200 megabytes, and this was from processing 40 JPEG images. (yes, using RAW is better and allows you way more latitude) but if space is an issue, do take note that final files can be huge.

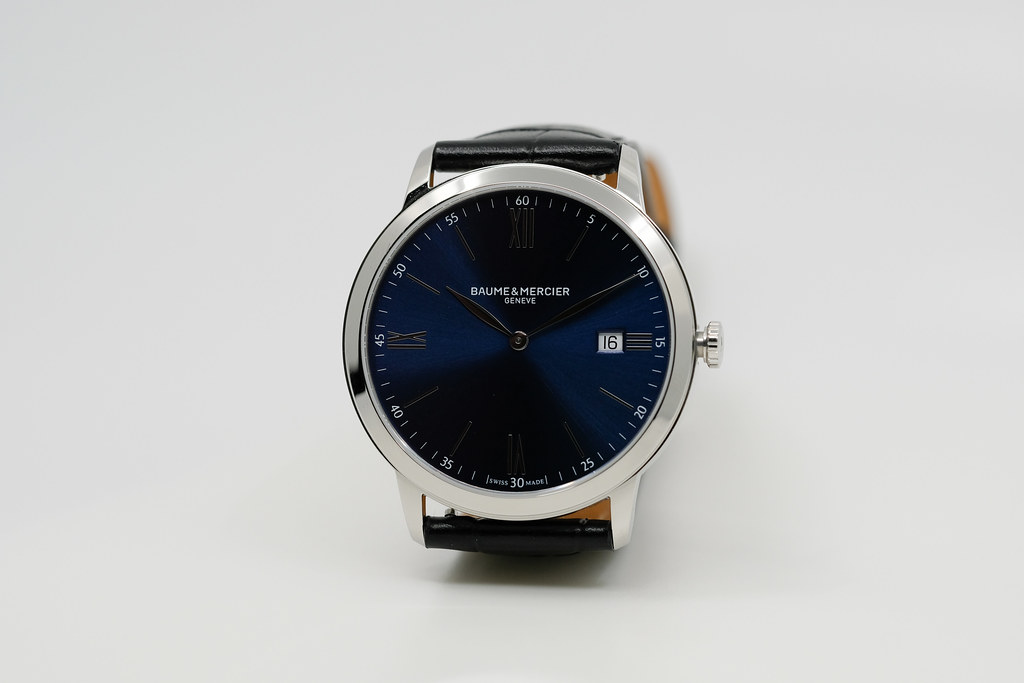
The final stacked shot. 😄
And at the end a few things I really have to confess while trying out this feature are:
- A macro lens would have been much more appropriate, but I didn’t have access to either an XF80 or XF60 so this was with what I had available.
- Settings. The lower the ISO the better, I should have set ISO200, but in a rush to get things done I used ISO640. Aperture size wise, as a friend reminded, F5.6 was ‘not here nor there’ and I gotta learn more.
- Post processing. I am sure there’s more methods out there than the one I shared, pls do share with me if there’s better methods as I am still trying my best to figure out focus stacking rightly.
Thank you for reading, and of course if you have any further questions – simply comment below.

Nice! …..as always!
Simon
LikeLike
thank you 🙂
LikeLike
Here were would you set focus. centre of the watch or beginning of the watch?
LikeLike
Hi, i settled for the center area of the watch face to start.
LikeLike
Thanks !!!
LikeLike
Hi nice article. If you are seriously into stacking, consider the application Helicon Focus. It will speed up the operation tremendously, as well as the quality. There is a free trial.
LikeLike
Hi Servaas, thank you ; I’ll definitely take a look at Helicon Focus 🙂 there’s still much to learn about stacking for me.
LikeLike
Hello
Nice work… I made my first attempt at the same exercise today and had the challenge of the second hand moving during the shots… anyone have any suggestions on how to avoid this issue? Is it something to be fixed in PS after the fact by choosing the most suitable image and masking it in?
Regards
Simon
LikeLike
Hi Simon, actually for most shots of this nature – I’ll suggest that you pull out the crown so that hands stop moving. 🙂
LikeLike
Thanks for this – but there are so many questions that Fuji has not answered about this feature. Maybe you’ve worked them out as I’ve spent the last couple of hours unsuccessfully doing that.
Should the initial focus be behind (closer to the camera), co planar with, or ahead (farther from the camera) relative to the sweet spot in the subject. This ties in to the question ‘does the changing focus only move in one direction, and if so in which one? ‘
What do the steps represent? percentage of allowed sensor movement? tenths of mm? hundredths of mm?
I’ve gotten a few nice stacked images but they’ve been more the result of good luck than understanding whats going on.
Thanks for exploring this!
LikeLike
Hi Paul, thank u for dropping by. I agree with u totally coming to the lack of literature.
For the questions you posted (which I’ve even asked the local product specialist and he couldn’t really answer) but my gut feel is ‘anywhere’ is ok as it seems the system is smart enough to run the full area and stop automatically when it has enough coverage. The steps seems to be in all an arbitrary number frankly as trying diff settings didn’t cause me to screw up or etc.
LikeLike
So I set up a metric ruler and set the focus on an arbitrary point. I then set it for 50 steps of 1 increment and shot 50 frames.
Turns out that the focus moves continuously ‘farther’. So if you set the ruler up with,say, 1 nearest you and 10 furthest then focus on the 1 and start shooting it will progressively move towards the 10 never returning to where it began.
That at least answers part of the question – where to focus to start. The answer is ‘short of’ or ‘on the nearest desired point of sharpness’.
As for the increments I’m going to make a guess here.
I suspect that since the sensor is what’s moving and the focus position of the lens is not changing then the range of movement must be the range of movement of the sensor. It can’t be mm or 1/10’s of mm as there’s no way the sensor can move that far. It has to be a percentage of the range of sensor movement. So if you move 5 shots with a step size of 10 you should see 50% of the total range of sensor movement. If yo shoot 10 shots with a step size of 5 you should get the same thing.
I’ll play with this and see if it holds up to scrutiny and let you know.
Once again, thanks for your site!
LikeLike
Wow, thank you. That’s very informative. I agree It should be the sensor shifting too taking the shots.
LikeLike
Well it’s Oct 12 and I hope we can keep this party going. Been frustrated trying and seeing no change from first shot to last (25th). Shooting macro w overall front to back of about four inches.
LikeLike
I too have found that focussing starts at a near point but can be a problem that focussing continues far further than required.
Would be preferable if, like Nikon (I believe), both nearest and furthest focussing points are initially set.
LikeLike